How to Make Fantastic Custom Tie-Dye Shirts at Home

This custom tie dye shirts tutorial is sponsored by Cricut. All opinions are my own.
Are you looking for a summer project for the whole family? Then you will love this custom tie-dye shirts tutorial. It is so easy to make your very own custom t-shirts at home with the Cricut Joy™ and Smart Materials™. They are the ultimate tools for creating plenty of activities to keep your family busy this summer.
Custom Tie Dye Shirts
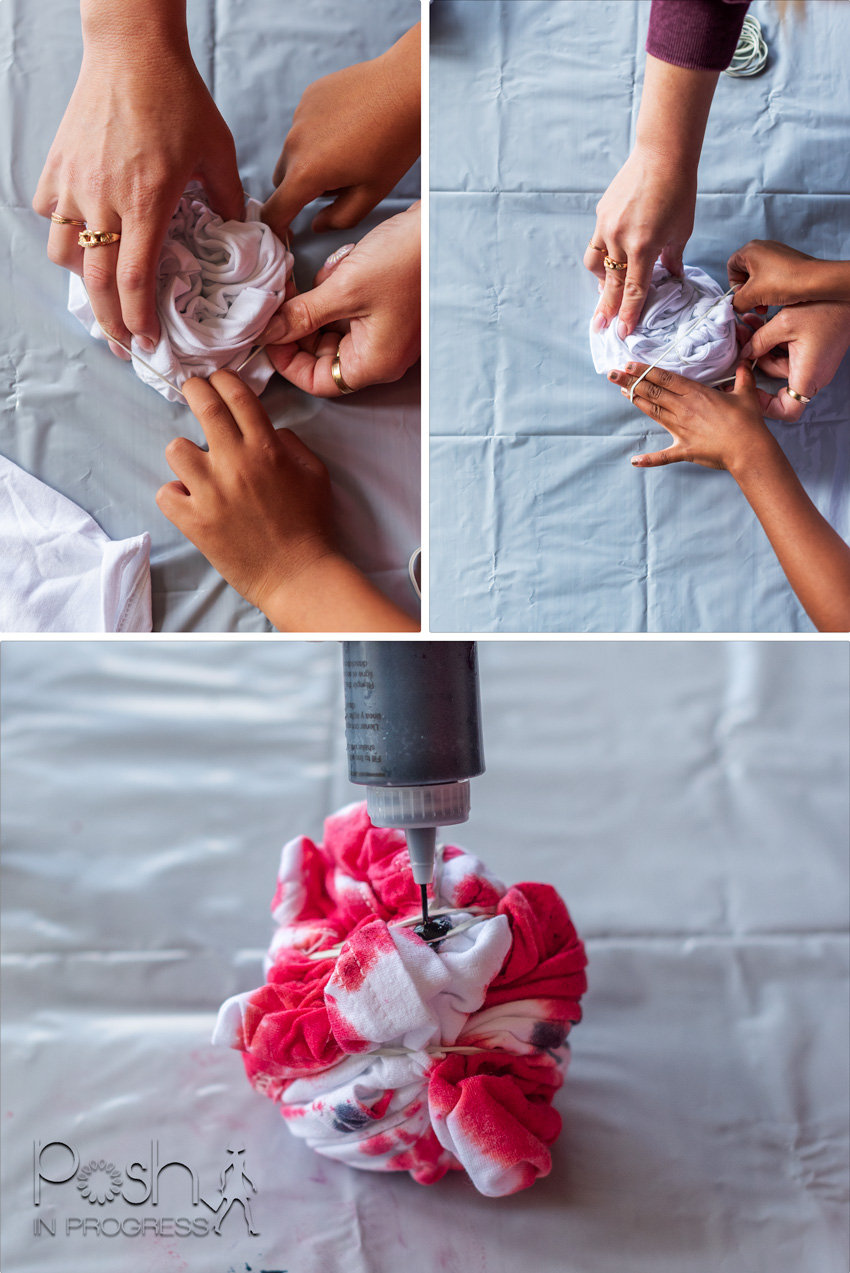
To start, you will need white t-shirts and a tie-dye kit. I used this kit, but any clothing dye will work. I got this set of t-shirts for my kids. Once you have your materials, you can decide how you want to make your custom tie-dye shirts. It’s easiest to use rubber bands to tie up the shirt in whatever way you like. We did a swirl pattern on our t-shirts.
Once you have your shirt ready with the rubber bands, you can squeeze dye onto the shirts however you want. We used three colors, but you could use one, two or more. It really depends on how you want the shirt to look. The kit I purchased also shows different styles of tie-dye for your reference. Make sure you saturate the shirt more than you think you need to. As you can see, my kids didn’t use a ton of dye, so they ended up more spotty, but still really cute.
Once you are done with the dye, you should wrap the shirt in plastic wrap overnight, so the dye can soak in. The next day, rinse the shirt in cold water to remove most of the excess dye. Then, you’ll want to launder each of your shirts. I actually did mine separately, so the colors wouldn’t bleed. Then, I dried the shirts completely. Once they were washed and dried, we were ready to create the custom designs with our Cricut Joy.
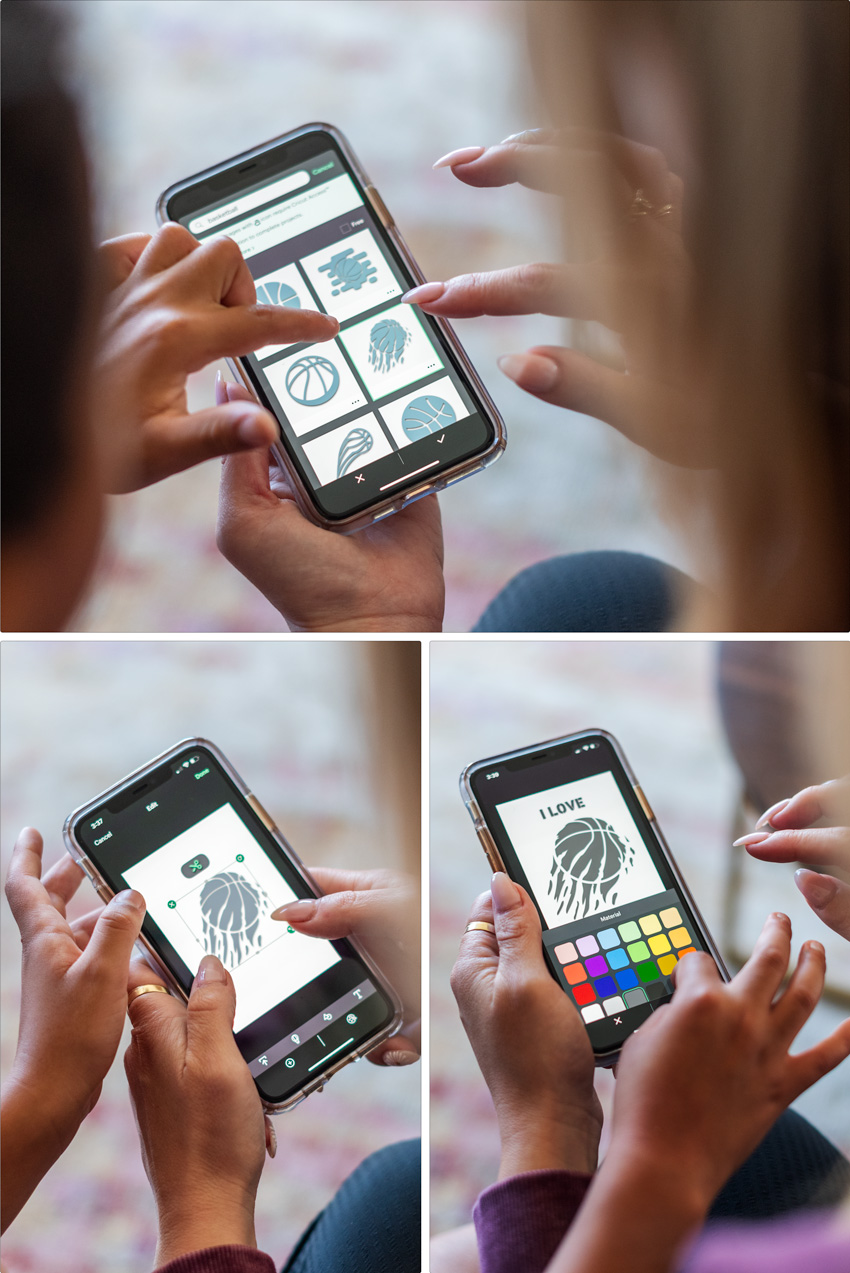
The thing I love so much about the Cricut is the fact that they have their own design app so you can create whatever you want. There are so many amazing uses for the Cricut Joy, like making labels, iron-ons (like we did), greeting cards, and so much more. The app is so user-friendly, even my kids helped with designing their custom graphics. My son chose a flaming basketball and my daughter chose a ballerina.
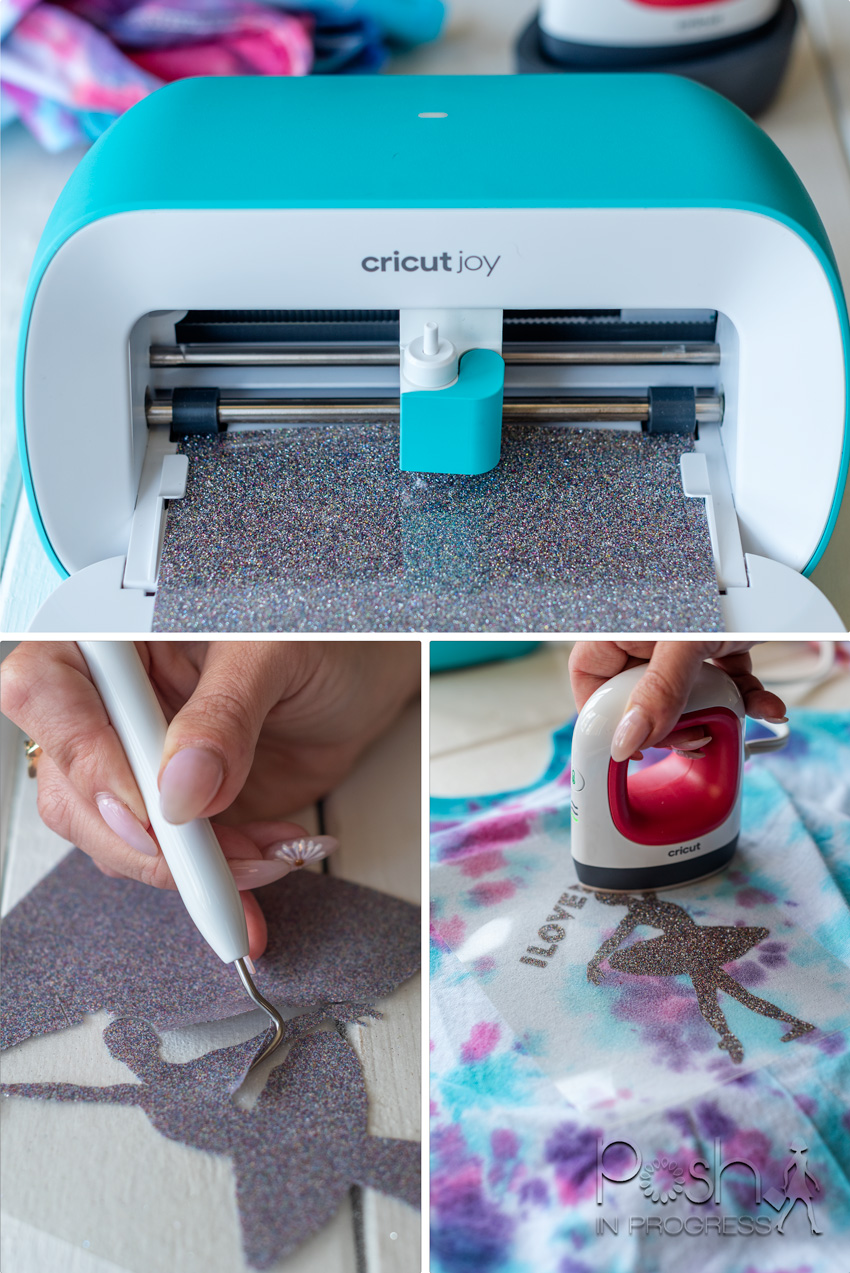
Once we finished the custom tie-dye shirts designs on the app, we chose the smart iron-on material that they liked best. My daughter chose this fun silver glittery material and my son chose a navy blue. It Is so simple to use the Cricut joy. Right from your phone, you can create original designs and then send the design right to the printer through wireless communication between your phone and the Cricut Joy. It takes only seconds to cut out really cool designs. Once the design is printed, I use my weeding tool to remove the excess material. Then, I used the Easy Press mini to adhere the design to the shirts.
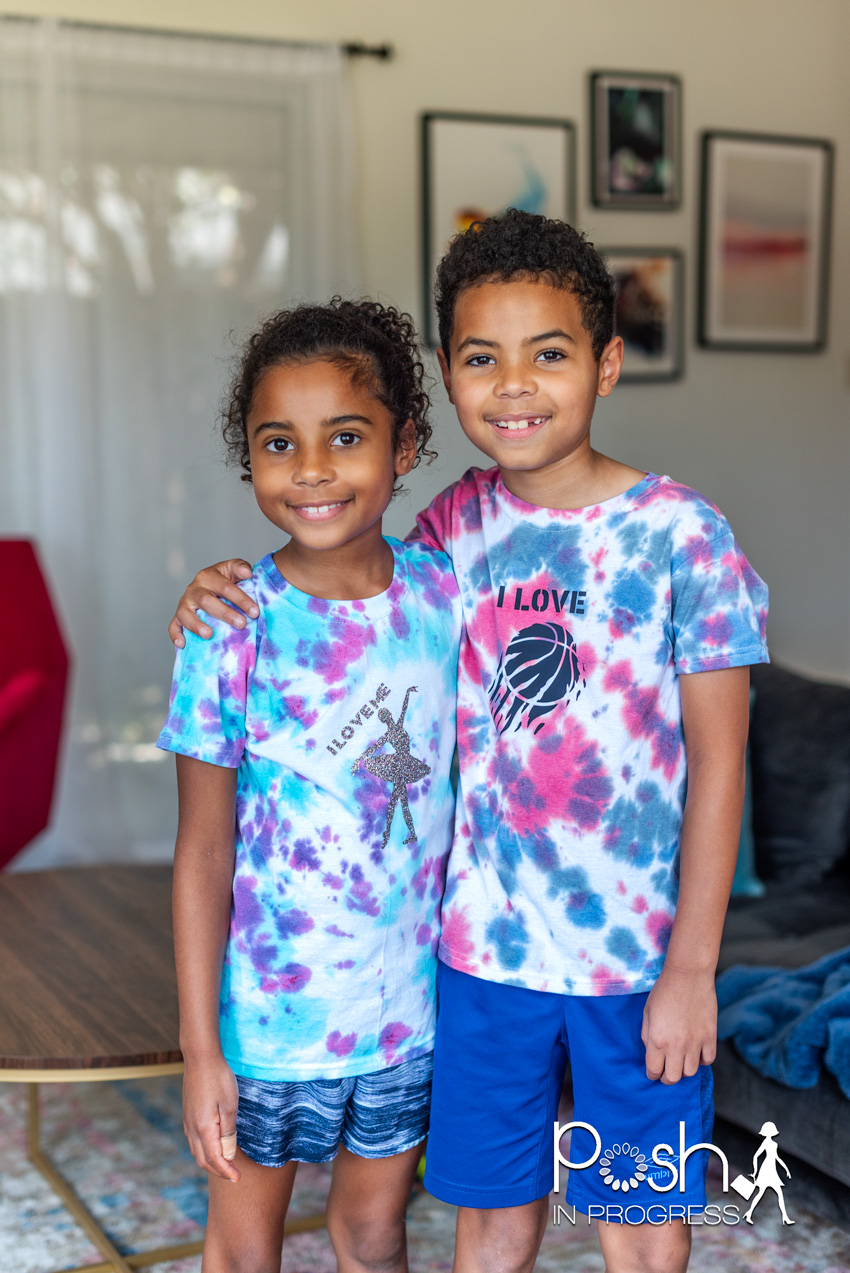
To adhere the graphic to the t-shirt, glide the easy press back and forth for 30-45 seconds. Then, let the plastic cool completely before trying to remove it. That’s it! You now have custom tie-dye t-shirts that your kids will love! If you’re looking for a fun summer project, this is a great one for the entire family. My kids wear their new shirts all of the time and they are so proud they made them themselves!
If you’re looking for other fun activities for kids, click here.
Have you ever made custom tie dye shirts before? Let me know in a comment below!
This site uses selective affiliate links, which means a commission is earned if you make a purchase via the link. The price you pay will be the same whether you use the affiliate link or go directly to the vendor’s website using a non-affiliate link.
Our editorial content is not influenced by advertisers or affiliate partnerships. We appreciate, and thank you for, your support!