This DIY Patio Makeover For a Small Space Turned Out Amazing
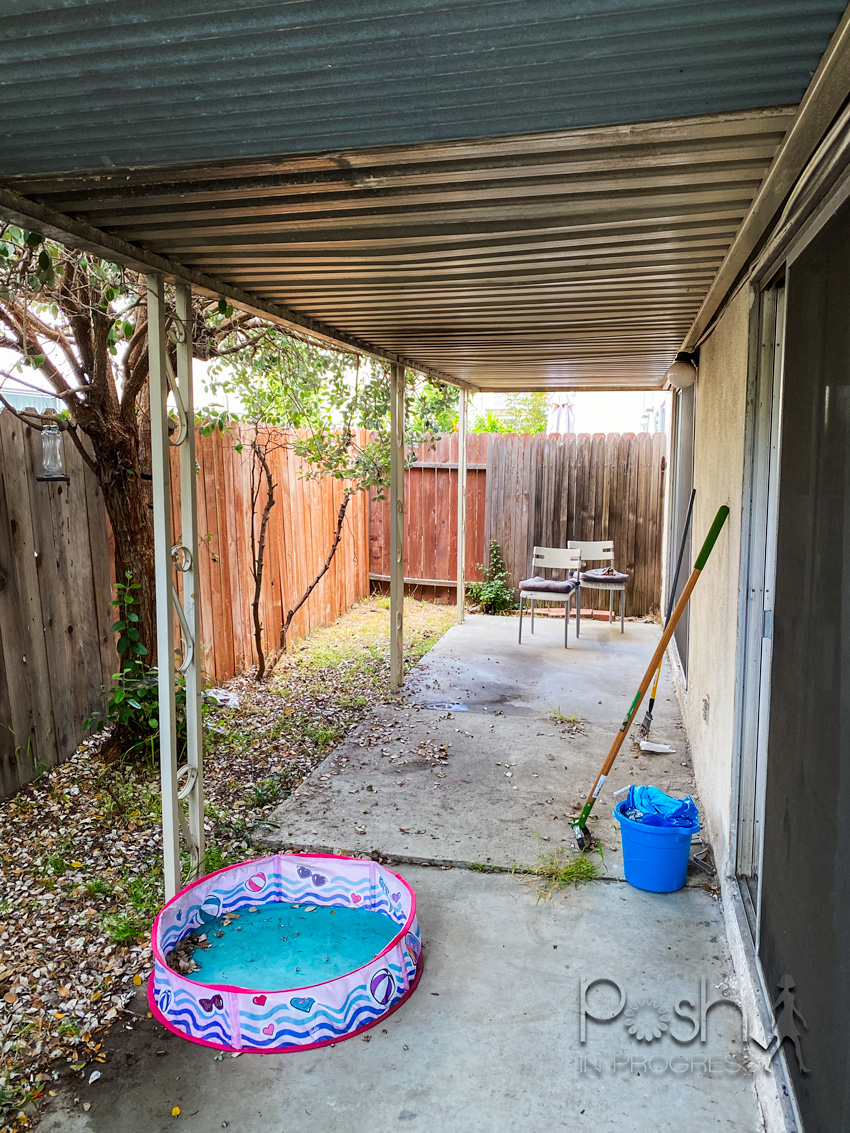
We moved to California in 2018. When we chose our place, one of the things I loved about the house was the two large sliding patio doors that stretch the entire length of my open floor plan living room and dining room. Having these giant doors brings so much light into the space. The side patio always felt like an extension of the home, but it was really ugly. Honestly, I don’t do a lot of home decor. I’ve never really done a DIY patio makeover, so I wasn’t confident I could pull it off. I finally decided to spend some time this summer to recreate the space. I was inspired by an acquaintance who took a small, bland space and made it really special. Seeing her DIY patio makeover gave me the confidence to tackle my own. If you’re thinking about doing a small DIY patio makeover, I hope my experience can inspire you too.
DIY Patio Makeover Outdoor Flooring
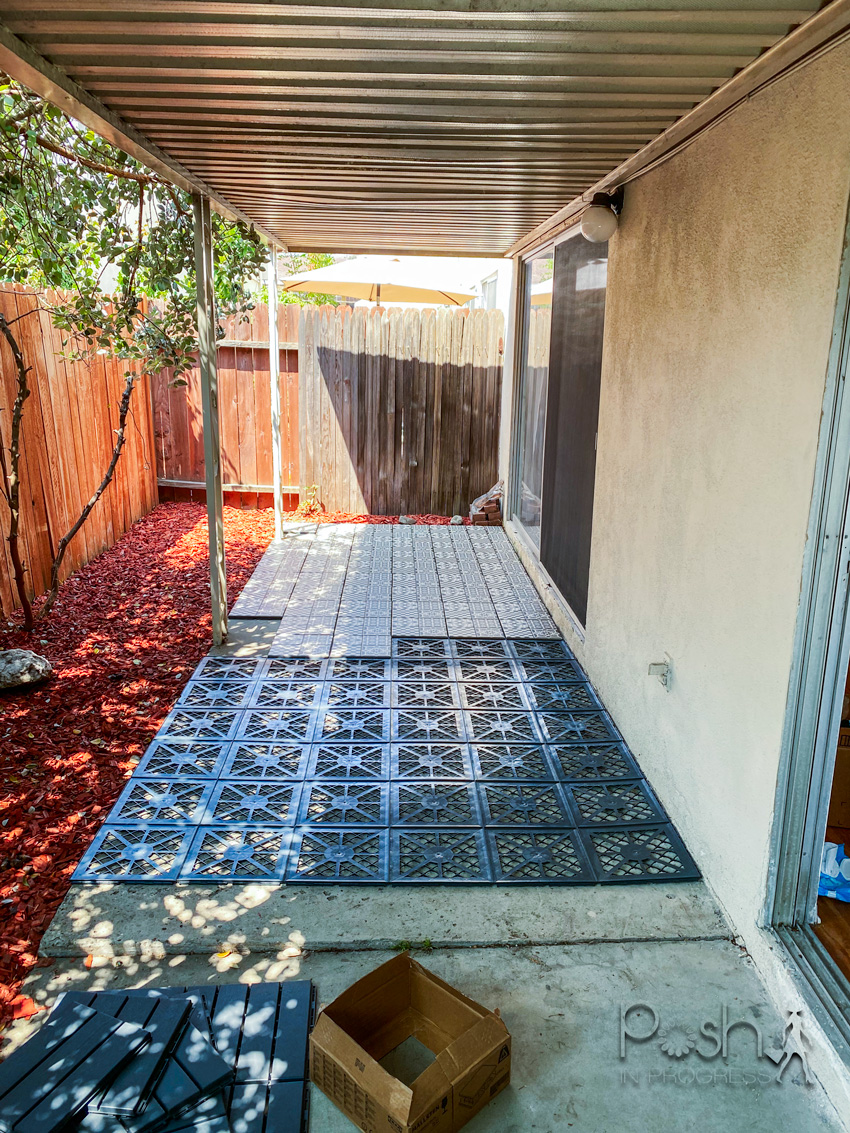
This entire project took me over a month to finish. I only worked on it during the weekends, and we also traveled several times this summer, which put the project on hold. The first few weeks, I focused on transforming the old, uneven, and ugly concrete slab by adding these cool floor tiles. The flooring system is really neat. There are plastic squares that snap together. Then, you can insert the tile into each of the squares. It keeps the tiles in place without having to do any grout. If you’re looking for an option similar to mine, here are some other great outdoor tile options.. These interlocking floor tiles are great because they can really transform a space while also being a durable option that you can take with you when you move.
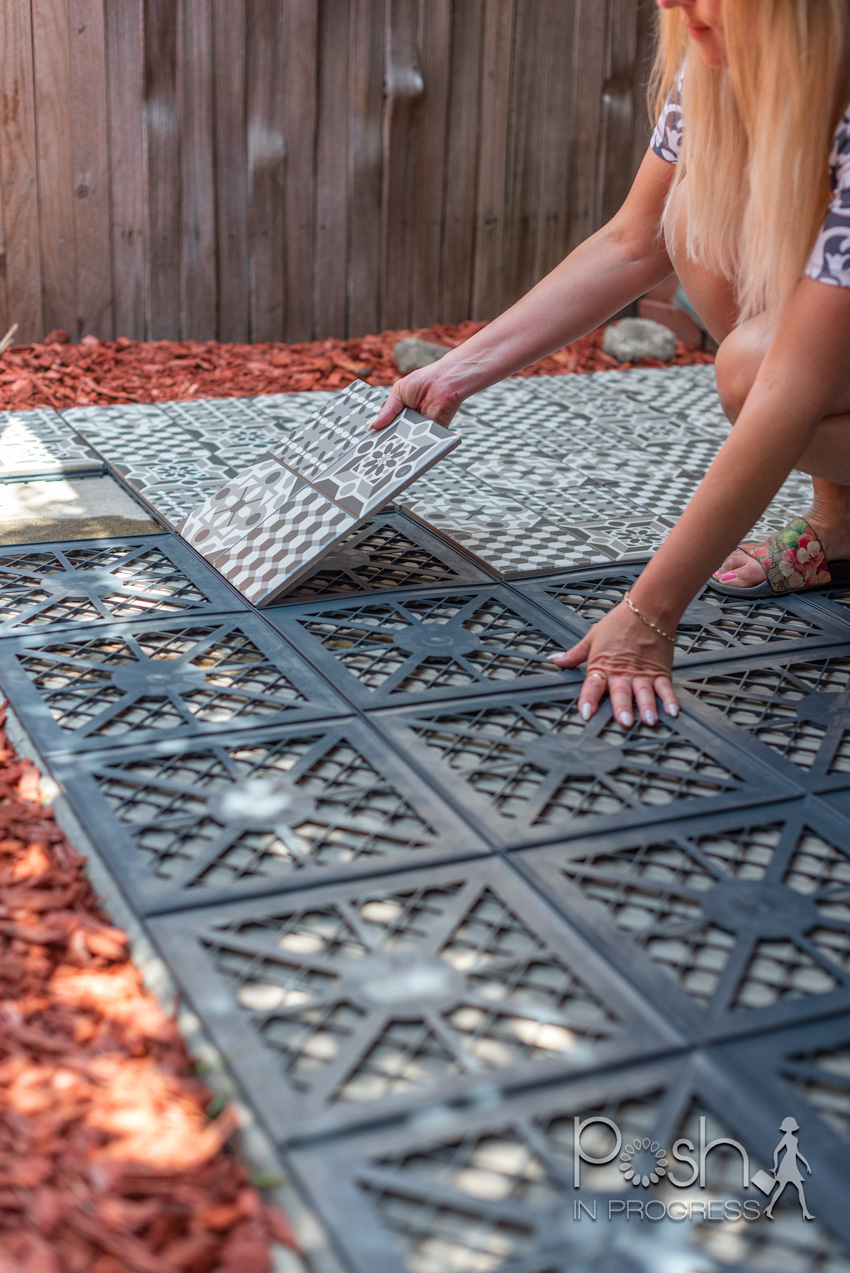
The tiles I chose ended up costing about $500. If you’re looking for a more affordable option, could have done plastic decking tiles for about half that price. However, I chose to spend more on the tiles because I thought the quality and design made the price worthwhile. Honestly, I love the tiles so much. It makes the space so unique. it was totally worth the price. I leave my windows and doors open constantly, so I get to enjoy the tile every day.
Laying Mulch
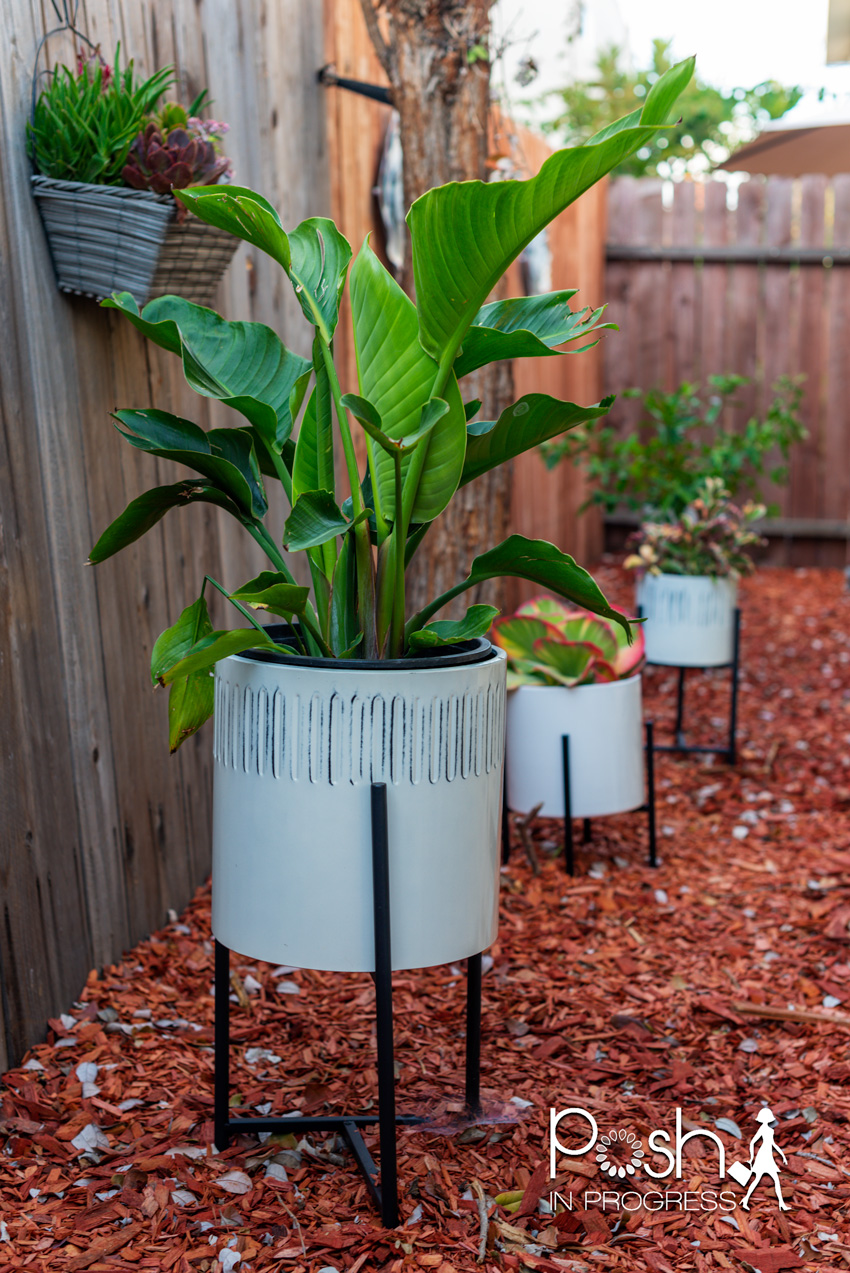
Once I finished the flooring, the other major thing I needed to do for this DIY patio makeover was cut down the trees, clean out the weeds and plants and add mulch. I chose a red mulch to add some color and I liked how it looked with the fences. It required about 10 bags of mulch to complete the entire project. I also pre-prepped the ground with landscaping fabric underneath the mulch so weeds wouldn’t grow. I’m so glad I chose red mulch because I think it makes the landscaping pop so much more.
Rather than plant plants directly into the mulch beds, I chose to do raised plants in black and white pots. The pots and the plants look so striking against the red mulch. I also think it’s much easier to care for the plants and the mulch beds by keeping them separate. If any of my plants die (I do not have a green thumb, hence so many succulents), it will also be much easier to replace them.
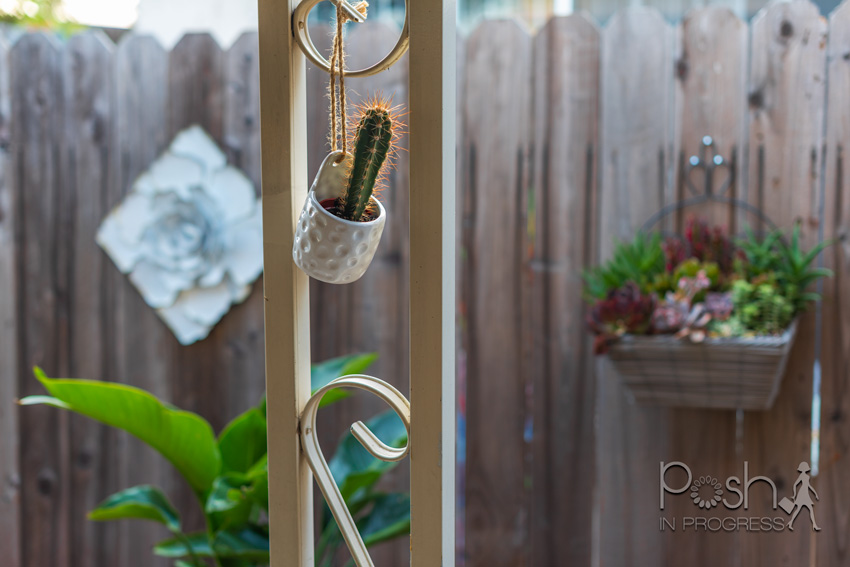
One of my favorite little details of my DIY patio makeover is the tiny little succulents hanging from the patio cover pillars. I found mine at Trader Joe’s, but here are similar ones. I am also in love with the little succulent garden I found at Home Depot. It was pre-planted with all of the different varieties of succulents, and I think it is so beautiful. For the price, I think it was actually cheaper to buy one pre-potted than to create the mini succulent garden myself. Here is a similar option if you want a succulent wall garden.
DIY Patio Makeover Decor and Accessories I Used:
Flower Wall Hangings
Dining Room Set
Chair Swing
Matching Chairs
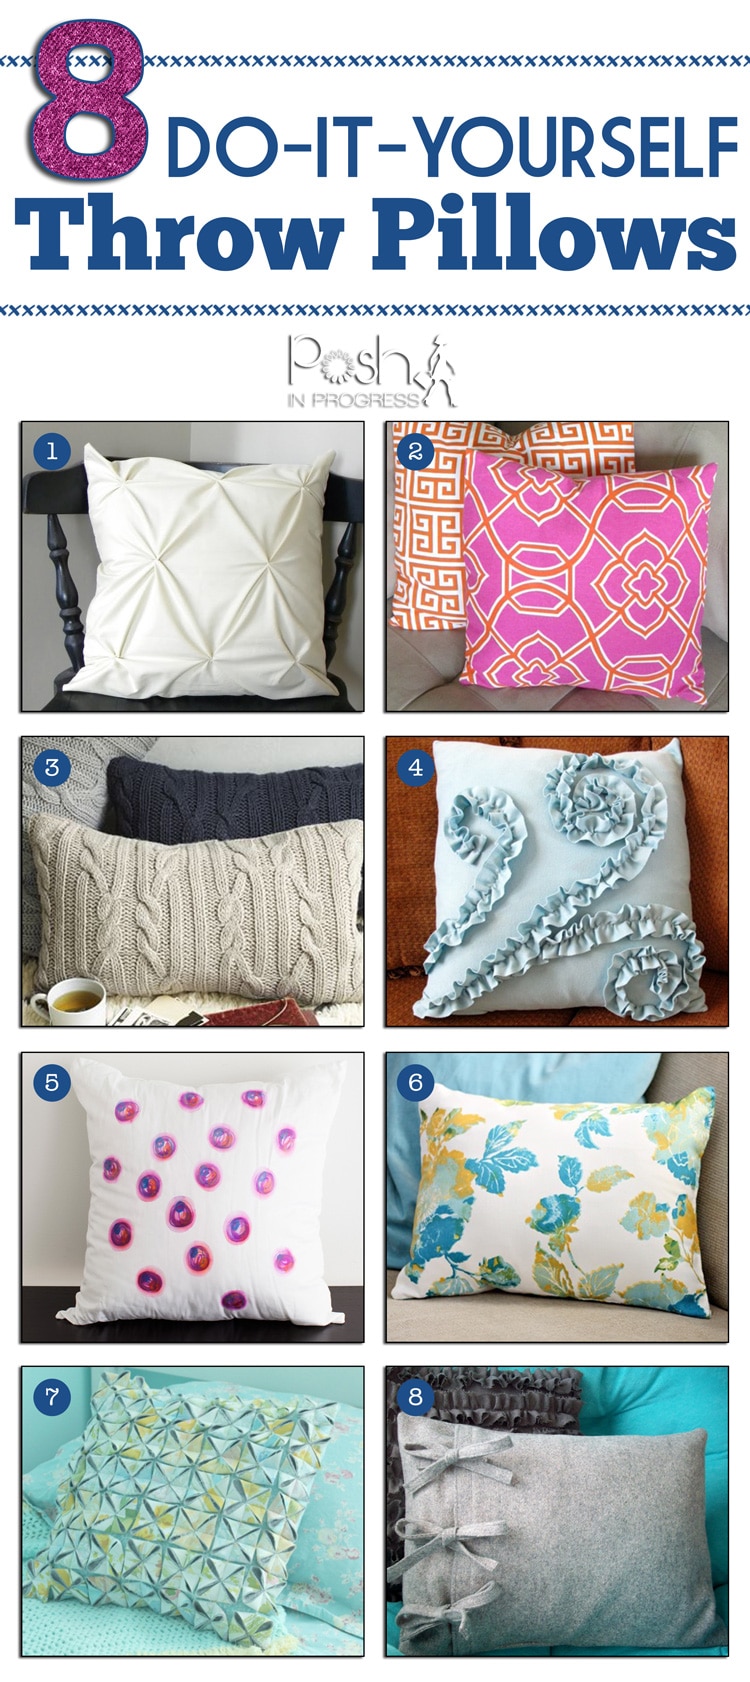
Yellow Throw Pillows
Multicolor Pillow
Love Seat
Ivory Pillows
Candle Holders; Candles
Black and White Pots
Throw Blanket
Grey Storage Bench
Leaves and Pot
Gold Plant and Pot
Floor Rug
Round Foot Stool
Hanging Cactus Plants (similar)
Mini Fire Pit
Side Table (basket I turned into table)
Affordable Patio Furniture
I wanted to keep this DIY patio makeover as affordable as possible. Whenever I redo a space, I know the furniture is where the bulk of the money is generally spent. Since I dropped quite a bit on the flooring, I wanted to try to find furniture that was quality but also not too expensive. Also, I wanted to ensure the furniture would be weatherproof and fairly durable. Although Los Angeles doesn’t get much rain, we do have near-constant sun, which can fade furniture. I do plan to keep it outside year-round. Thankfully, I also have a patio cover already, so the furniture is pretty well protected.
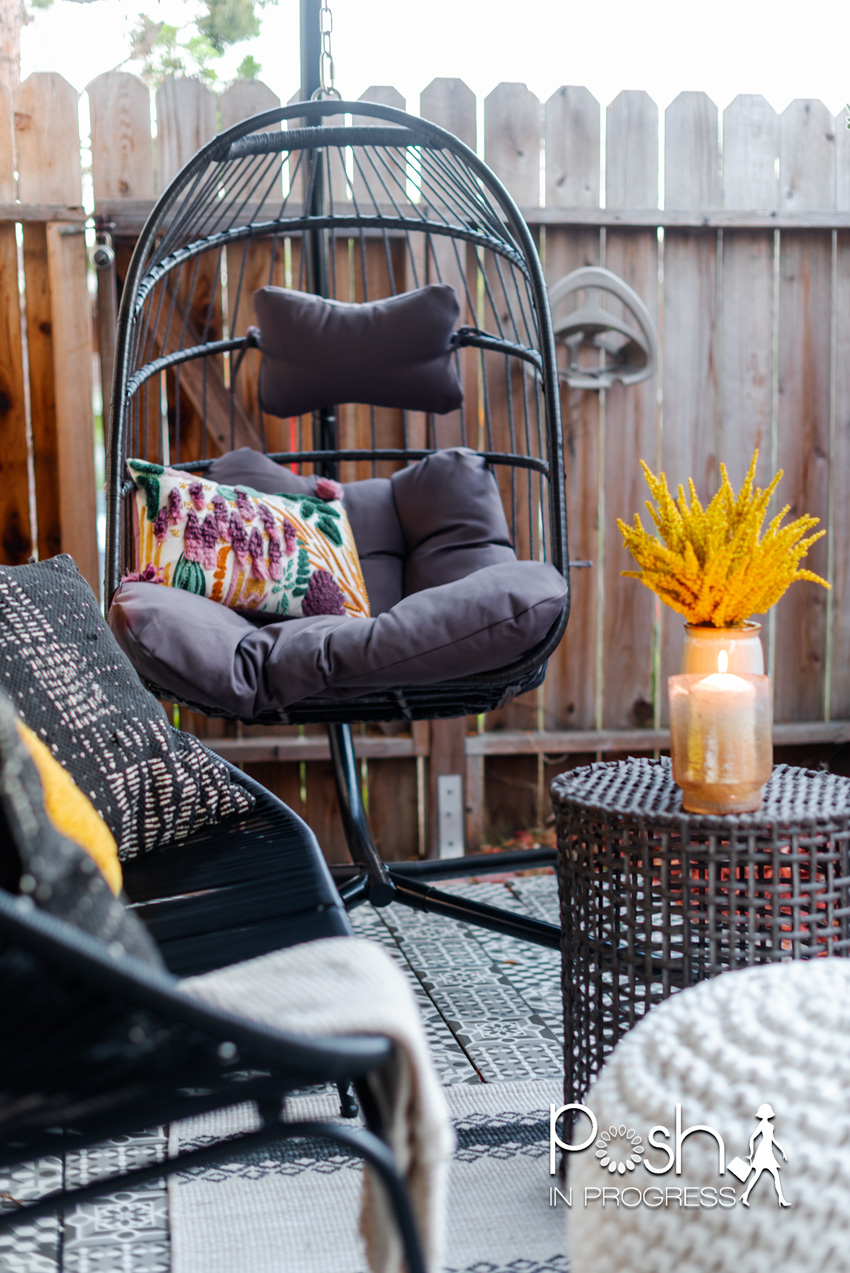
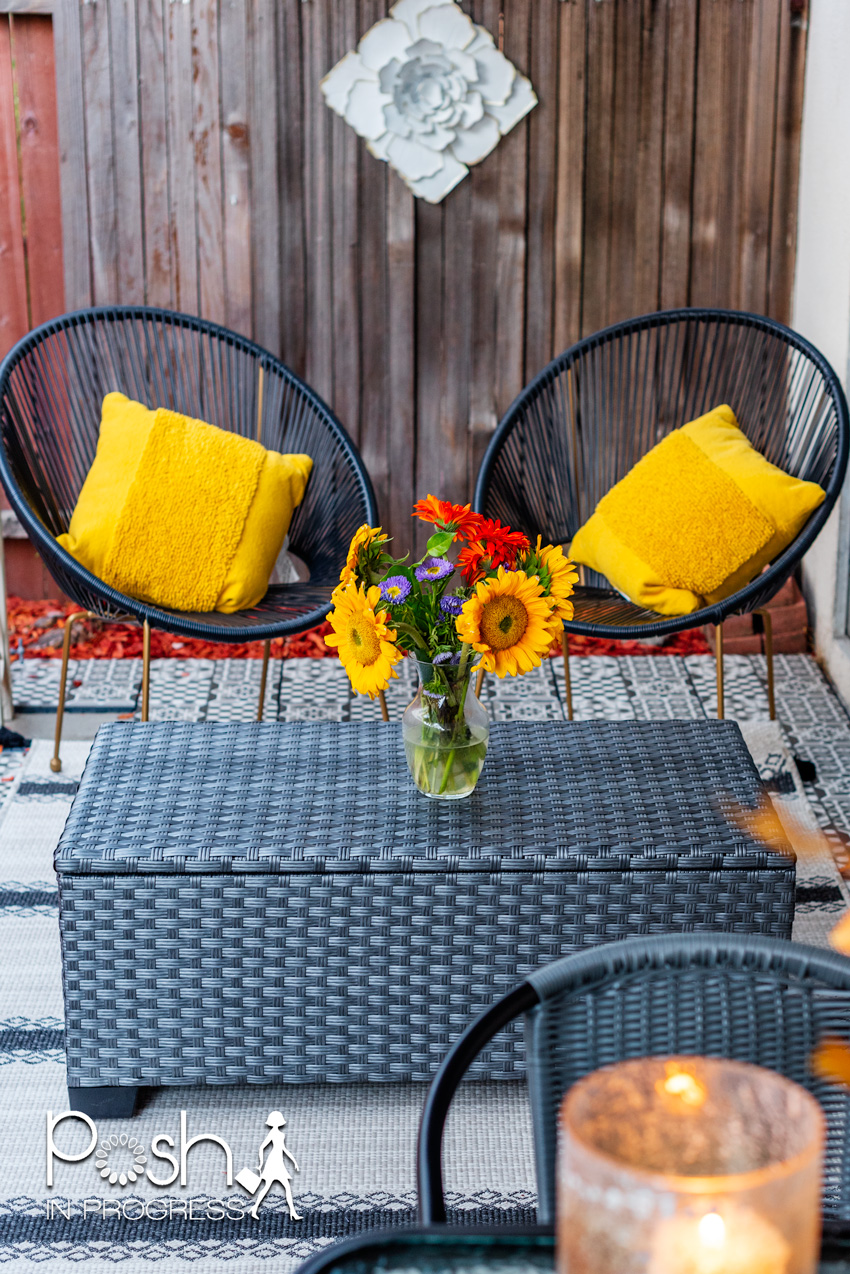
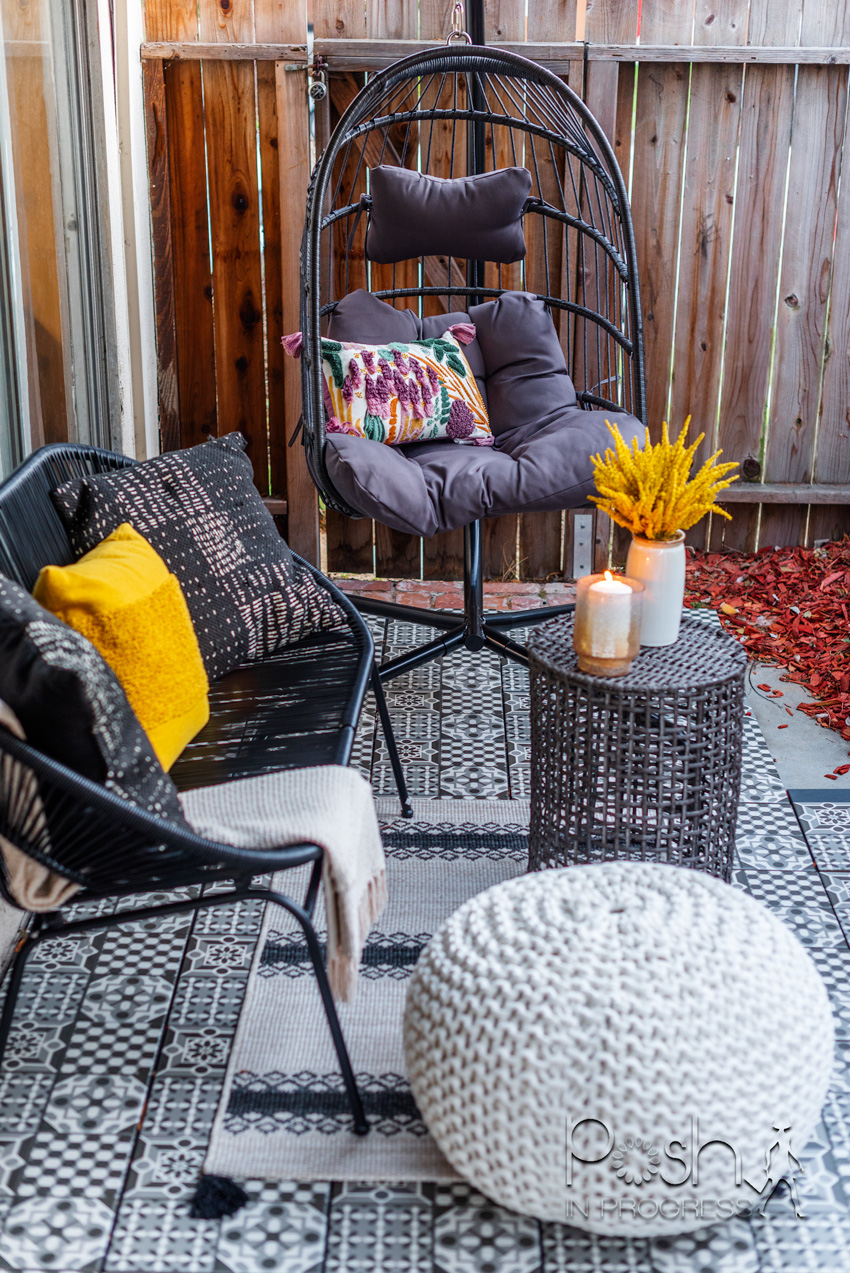
The first items I found are the two matching egg chairs. I absolutely love the woven egg shape and the gold legs. Initially, actually wanted to get four of them and use them as dining chairs, but they were the last two in stock. I chose to pair them with the storage bench. This storage bench is a great option because I can store all of the pillows inside of it. Although I do love having the pillows out, I usually store them most of the time to keep bugs and dirt off of them.
Choosing Furniture
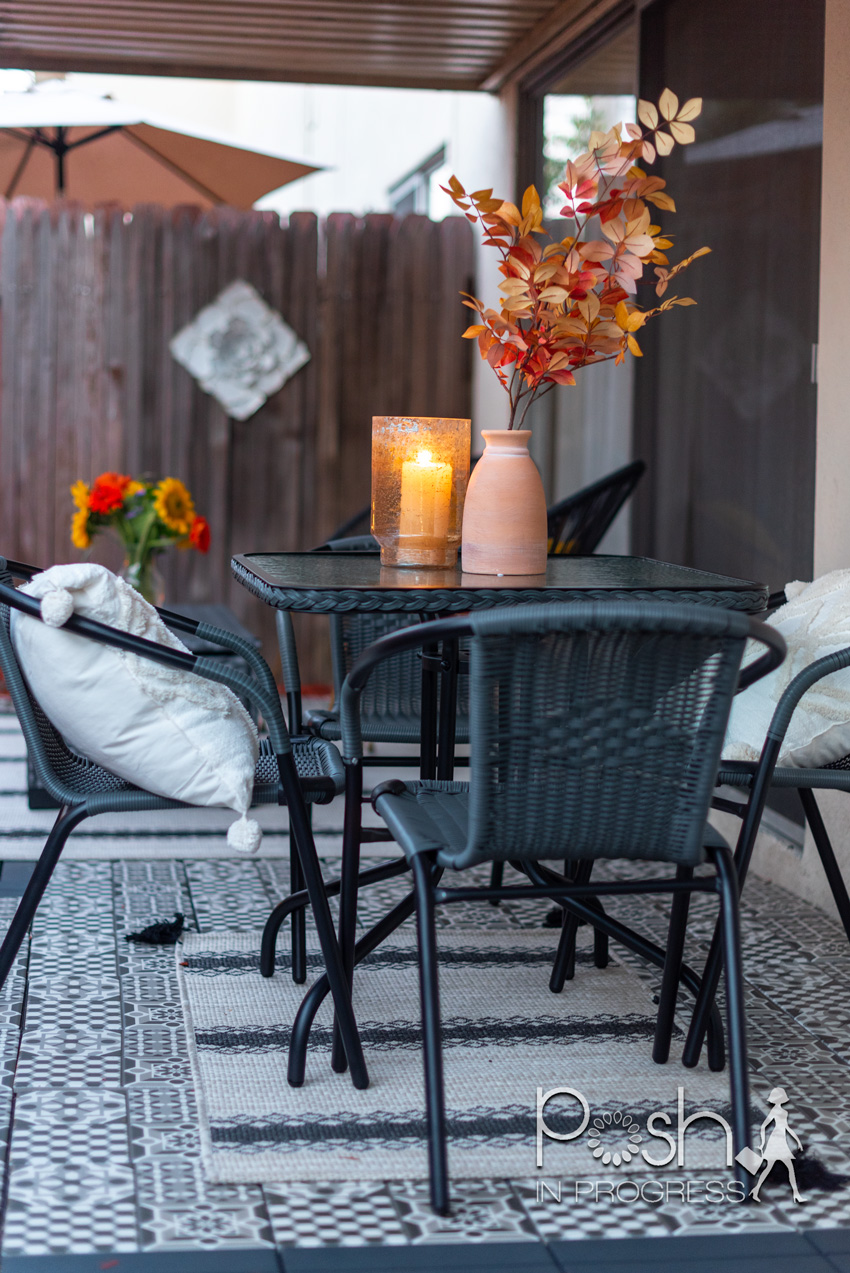
I was lucky to find all of the rugs on sale at the end of the season sale. I have one larger one with the chairs and bench and two smaller ones under the dining set and with the bench. As for the dining room set, I tried several different options before I settled on this grey and black set. Initially, I had more of a white and black French bistro set. But, I decided it just looked too different, and I preferred more of a matchy feel out there. Although my patio is quite long, it is not very wide. I think the space flowed a lot better with furniture that more closely matched.
Outdoor Hanging Swing
One of the pieces I knew I wanted to include with my DIY patio makeover was a hanging swing. I spent more time than I like to admit trying to find an affordable option. A lot of the hanging swings are well over $500, up to $1000. I was able to find one under $200! This was such a great choice for our space because my kids love it! All of us spend time out there together and the kid-friendly piece definitely helps. The swing is still totally safe and easy for them to access.
Outdoor Patio Accessories
Initially, I had very few accessories on my patio. Although on a daily basis, I probably won’t keep many accessories out there, they really do finish off a space. My kids loved the round white woven footrest I found. It worked really well with the love seat and little basket I turned into a side table. I also found a few really cute hurricane-style candle holders. These are perfect for outdoor because they don’t blow out. Since the majority of the space is ivory, grey and black, I definitely needed to add a pop of color. Pillows and flower arrangements are a great way to add color. Also, adding a throw blanket helps the space to feel cozy.
Overall, I am so in love with my DIY patio makeover. The space looks so much better. Now, I love to leave my curtains open and sit outside. An unexpected benefit is that my kids now also love to sit outside with or without me. It’s great to have a useable outdoor living space that makes my open floor plan living room/dining room even larger. In total, I probably spent about $2000, but it is money well-spent. I spent more than two years in this home never using my patio. I literally hated even walking out there. Now, I have a space I truly love and there is no better feeling than that.
If you’re looking for other home decor posts, click here.

This site uses selective affiliate links, which means a commission is earned if you make a purchase via the link. The price you pay will be the same whether you use the affiliate link or go directly to the vendor’s website using a non-affiliate link.
Our editorial content is not influenced by advertisers or affiliate partnerships. We appreciate, and thank you for, your support!