
These Halloween Spider Cookies Are Really Easy to Make

I’m so glad it’s Halloween season! It’s definitely one of my favorite holidays. Who doesn’t like dressing up in fun costumes and getting free candy? Next to Christmas, Halloween is definitely my favorite holiday. To get in the spirit, I decided to try making these fun Halloween spider cookies and I’m SO excited how they turned out.
If you’re a fan of peanut butter blossoms, then you’re gonna love this recipe. It’s my all-time favorite flavor combination – peanut butter and chocolate. Seriously, I never get tired of that combo. I know these Halloween spider cookies might look slightly difficult to make, but they are actually super easy.
To start, you’ll need a peanut butter cookie recipe. The day I made these, it was quite hot outside, so I froze my dough for 20-30 minute before I put them in the oven. Cooling the dough ensures it doesn’t spread too much. For this recipe, you want the cookies to be fluffy and not too flat.
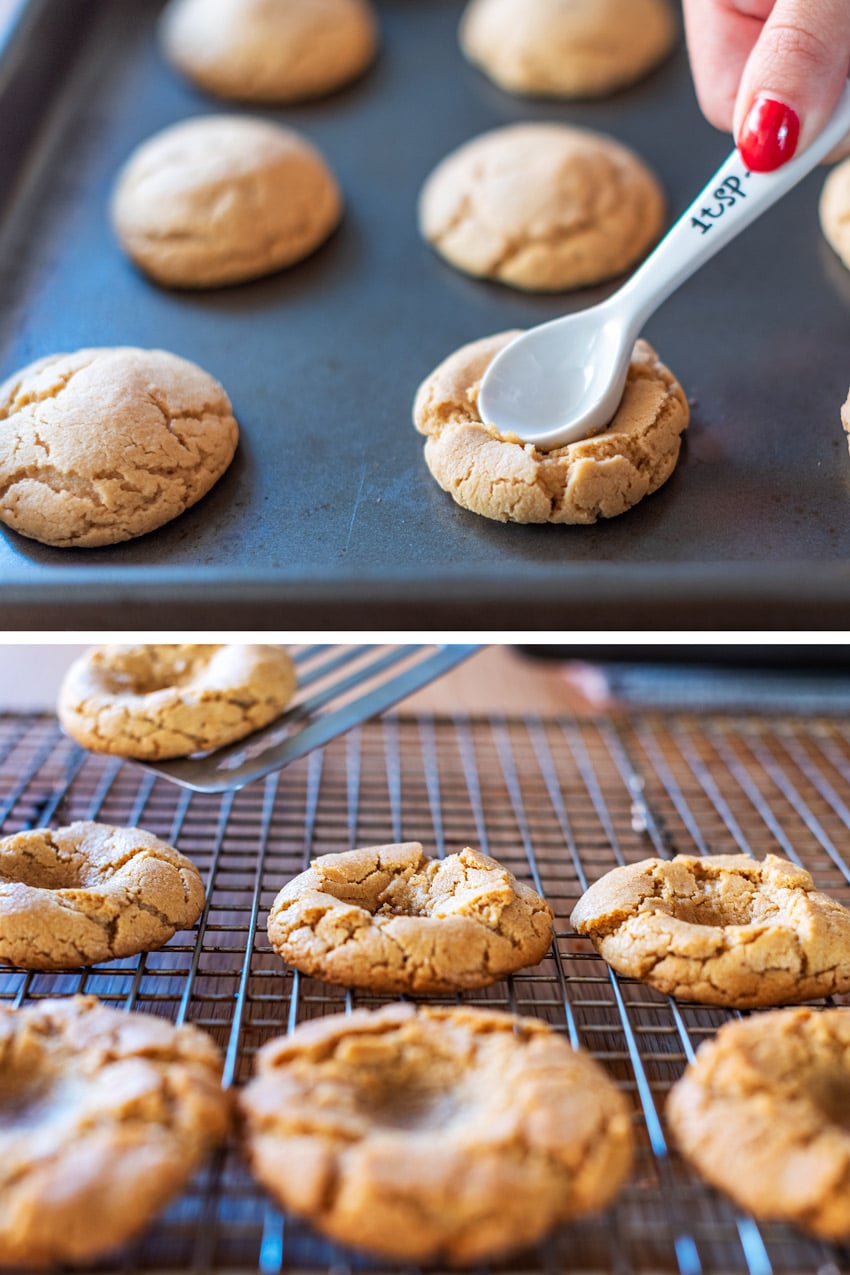
Once you have your dough made and your oven is preheated, you’ll bake the cookies, in round balls, for 10 minutes. Then, you take them out to make divots in the middle. I used the back of a measuring spoon to make the round divot, which worked perfectly. Then, you’ll bake the cookies for another 4-6 minutes, until slightly browned.
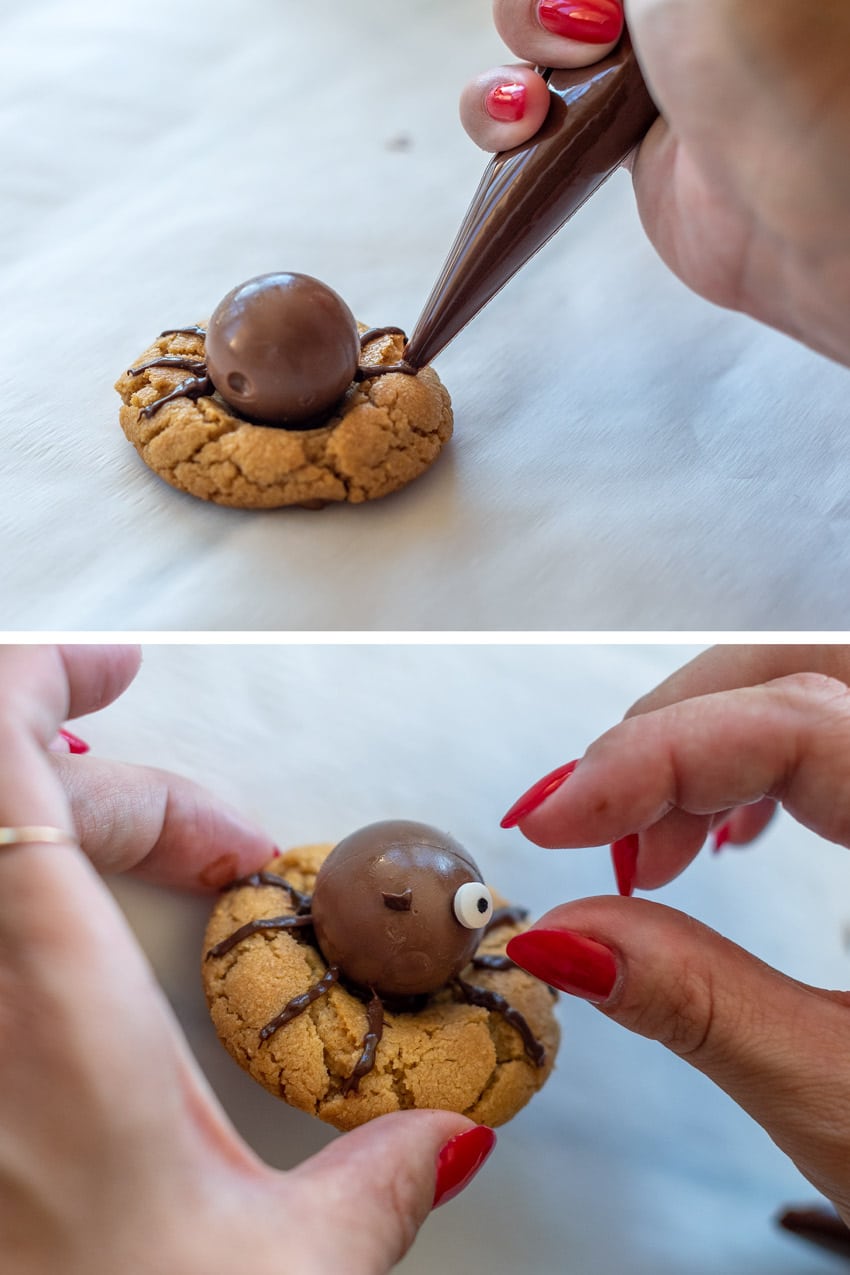
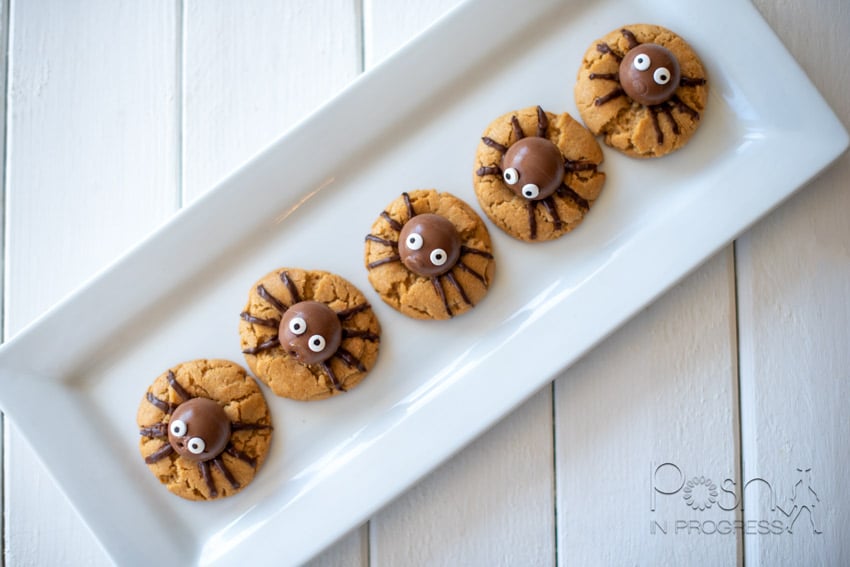
When I took them out of the oven, I let them cool for about 30 seconds to a minute before moving to a cooling rack. You’ll want your cookies to be completely cooled before you start the Halloween spider cookie decorating process. Once the cookies are cooled, you will melt some chocolate to use as glue to hold your round chocolates into place (I used these, but any round chocolate would work). Then, you can use the same melted chocolate to make the legs and glue on the eyes. I bought these eyes. I also used a pastry bag to pipe the legs, but you can totally use a plastic sandwich bag and just snip a corner.
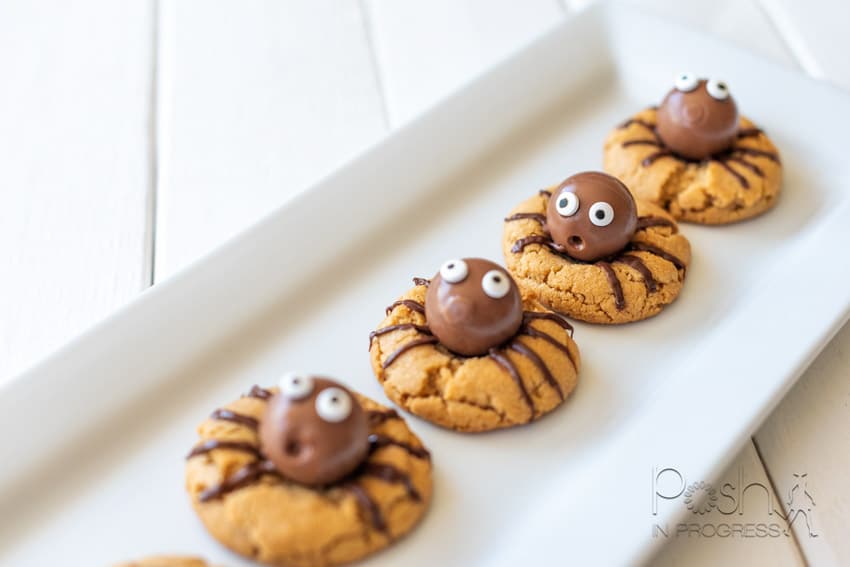
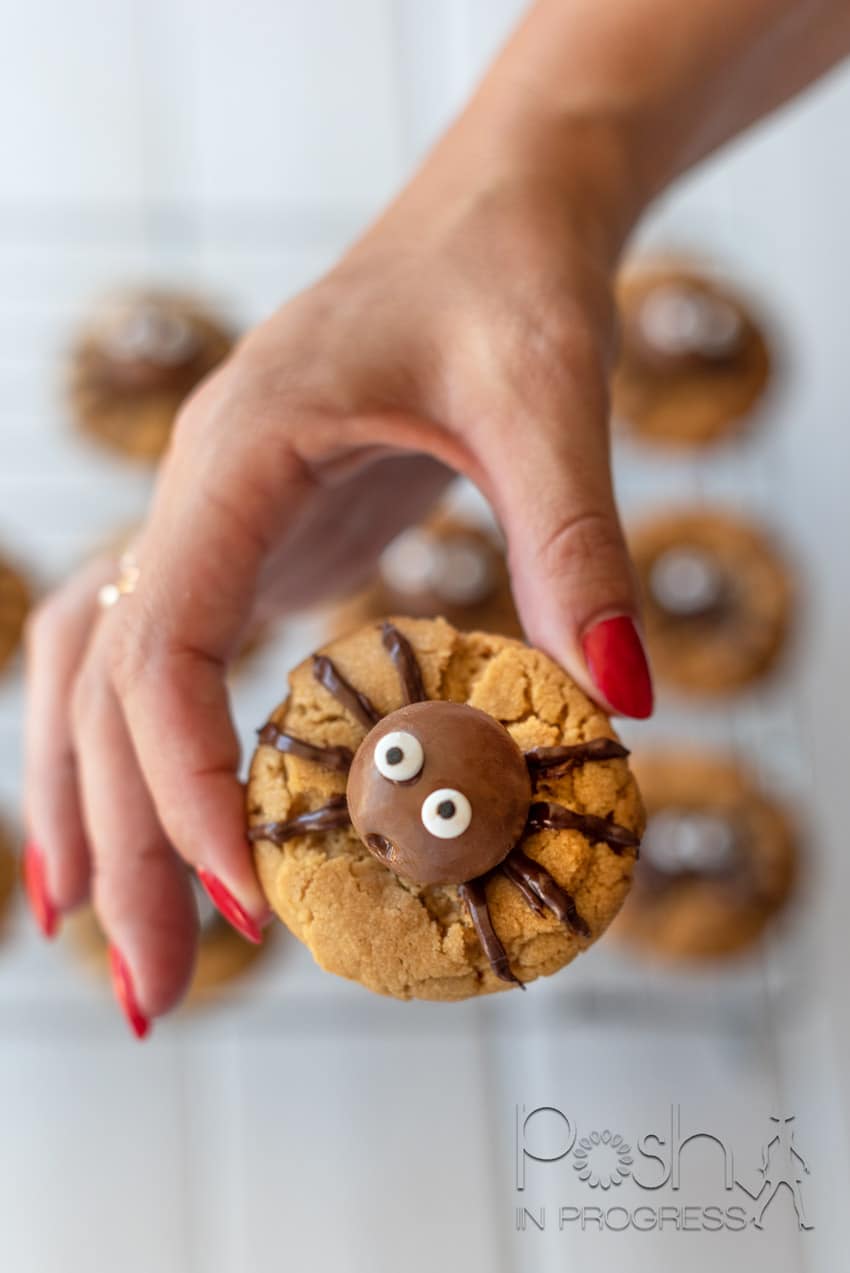
Overall, I’m so excited about how these Halloween spider cookies turned out! My kids absolutely loved them and I know they will be a huge hit to serve to guests this Halloween.
Looking for more Halloween recipes? Check these desserts out!
Halloween Spider Cookies
Ingredients:
1/2 cup unsalted butter
3/4 cup creamy peanut butter
1/3 cup brown sugar
1 teaspoon vanilla extract
1/2 cup granulated sugar
1 large egg
1 1/4 cup all-purpose flour
3/4 teaspoon baking powder
1/4 teaspoon baking soda
1 teaspoon salt
2 Bags Chocolate truffles (roughly 12-13 per bag)
Candy Eyes
Preheat the oven to 350 degrees F. Line two baking sheets with parchment paper and set aside.
Place the softened butter and peanut butter in the mixer and beat until fluffy. Then add both sugars and beat again until fluffy. Scrape the bowl and beat in the vanilla and egg.
In a separate bowl mix the flour, baking powder, baking soda, and salt together. Turn the mixer on low to slowly incorporate the flour mixture.
Roll the cookie dough into twenty-four 1 1/2 tablespoon-sized balls and spread 12 out on each cookie sheet. Bake for 10 minutes. Remove from the oven. Quickly use a pestle to press a cavity in the middle of each cookie. Then place back in the oven and bake another 6-10 minutes, until golden.
Meanwhile, unwrap all the chocolate truffles. Once the cookies are out of the oven, cool until almost at room temperature (but not very warm) and place a truffle in the cavity of each cookie. If the cookies are too warm, the truffle will melt. If the cookies are cool, the truffle won’t stick. (You can also wait until the cookies are completely cool, then glue the truffles in with chocolate to be safe.)
Melt the chocolate chips in the microwave in 30-second increments, stirring in between, until melted and smooth. Scoop the melted chocolate in a zip bag. Close the bag and snip off a small portion of one corner to create a hole. Pipe 8 legs on each cookie, starting from the truffle body down.
Then use the remaining melted chocolate to glue 2 eyes onto each truffle spider. Cool until the chocolate is firm and serve.
Oh my gosh, these are adorable! I love baking throughout the holidays, and Halloween is the official kickoff for me. I’m definitely going to make these for my church’s trunk or treat event.
Thank you, Daisy! Definitely let me know how they turn out for you 🙂
Made them and they didn’t last 5 minutes! I can’t believe how quickly they disappeared. They came out just like your photo and tasted so good~. Definitely a keeper for next year.