Baby First Birthday + DIY Rag Tie Banner
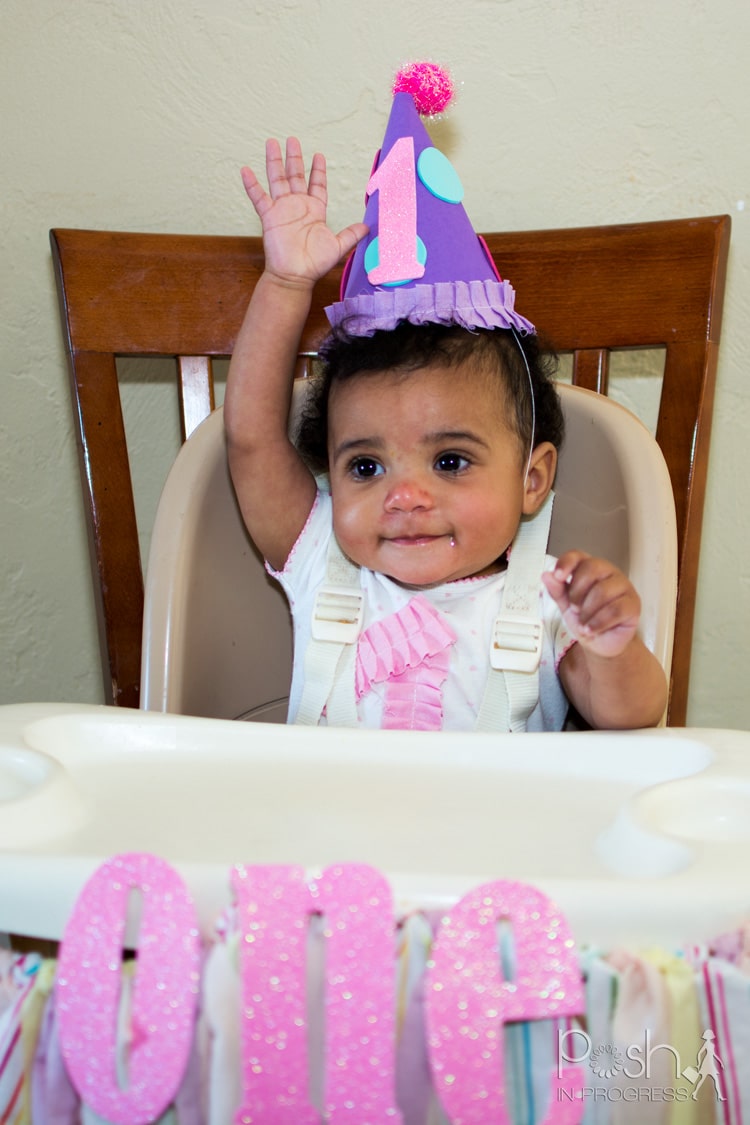
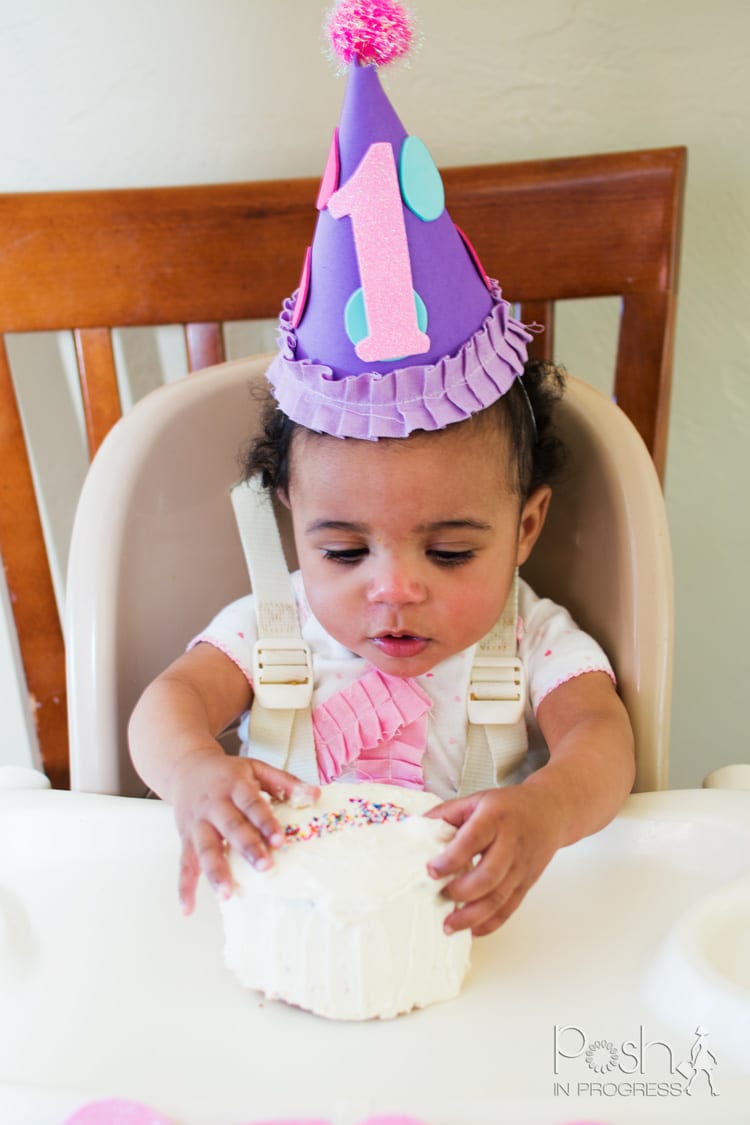
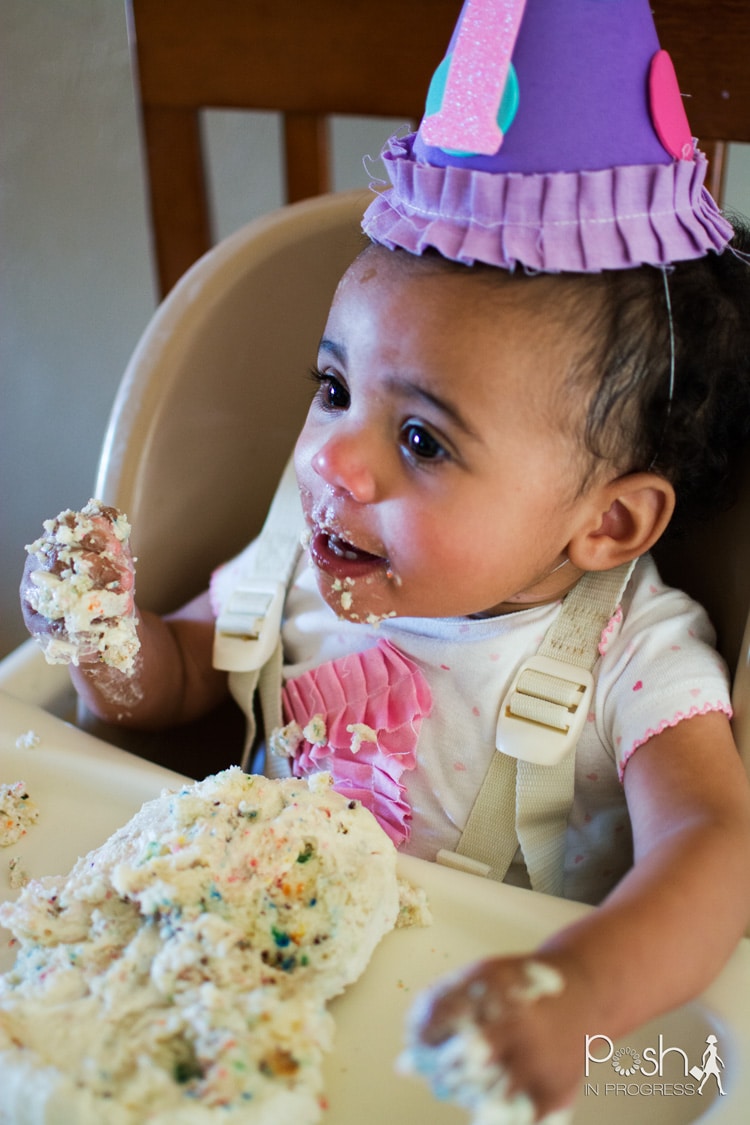
My baby girl turned one recently. Happy Birthday Gigi! To celebrate, I wanted to decorate a bit, but didn’t want to do anything too time-consuming (like Rocco’s fire truck party). My time is really pressed with work and juggling the kids, so I only had one weekend to do her decorations, the cake, and her outfit. I decided to keep it simple and concentrate on decorating her high chair, make her a cute outfit, and bake her a homemade funfetti smash cake (she loved her cake, if you can’t tell by the pictures!).
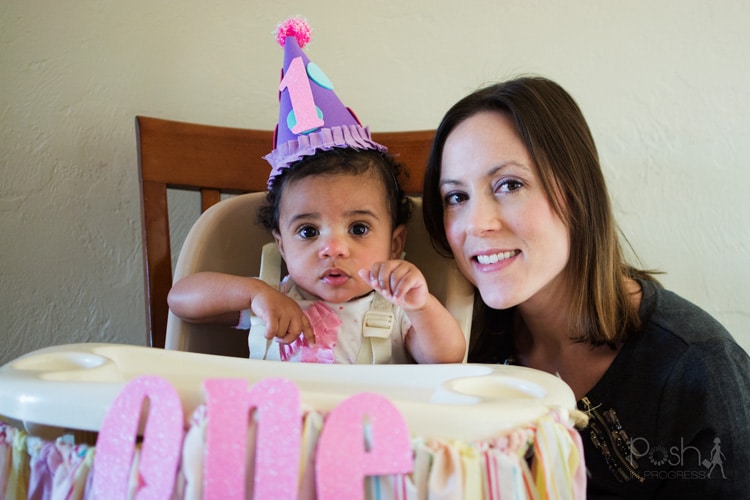
Per usual, I found some great inspiration on Pinterest. I decided to make a DIY rag tie banner to hang on her high chair. I also made her a foam polka dot hat and decorated a onesie with a big number 1 on it.

For the hat, I used craft foam from Michael’s. I used a paper hat as my template to cut out the foam. I simply measured the foam around the hat and cut out around it and attached the foam to the paper hat. I used tacky glue to add foam polka dots and fabric ribbon (found on clearance at Michael’s) around the bottom. I used adhesive sparkly foam to cut out a number 1 and the one letters for the banner. The adhesive back of the number 1 stuck right on the front of the hat. I used a staple to attach the sparkly pom pom on the top of the hat.
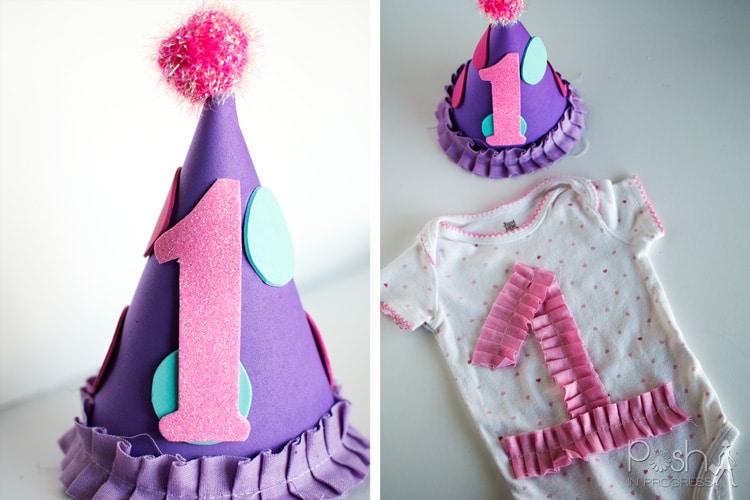
For Gigi’s outfit, I used an old onseie with hearts on it and simply glued a number one on the front of the onesie using the same tacky glue and ribbon like I used on the hat.
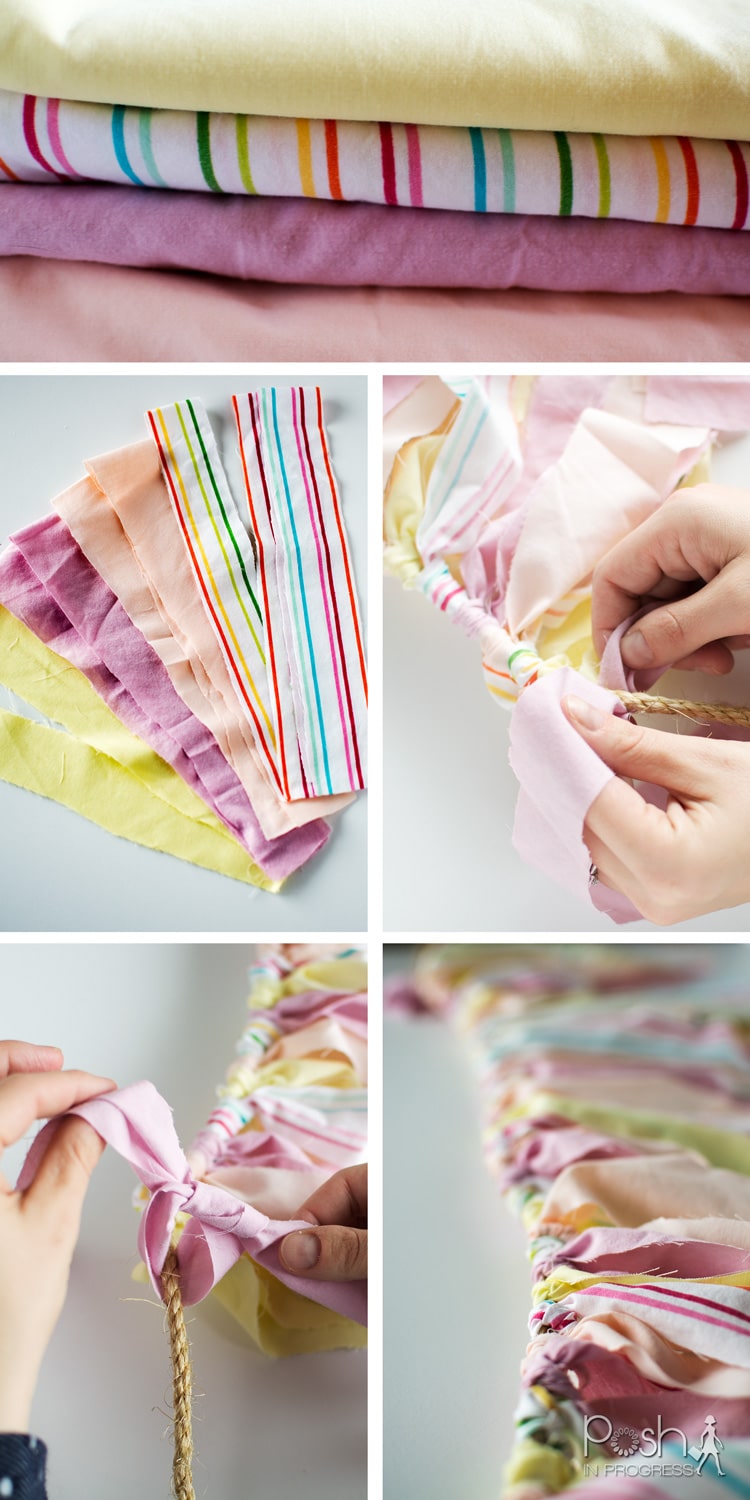
For the banner, I visited my local Goodwill store and bought four twin sheets in pastel colors. You could choose any sheets or cotton fabric you like. I definitely wish I would have chosen slightly bolder colors to stand up against her beige chair.
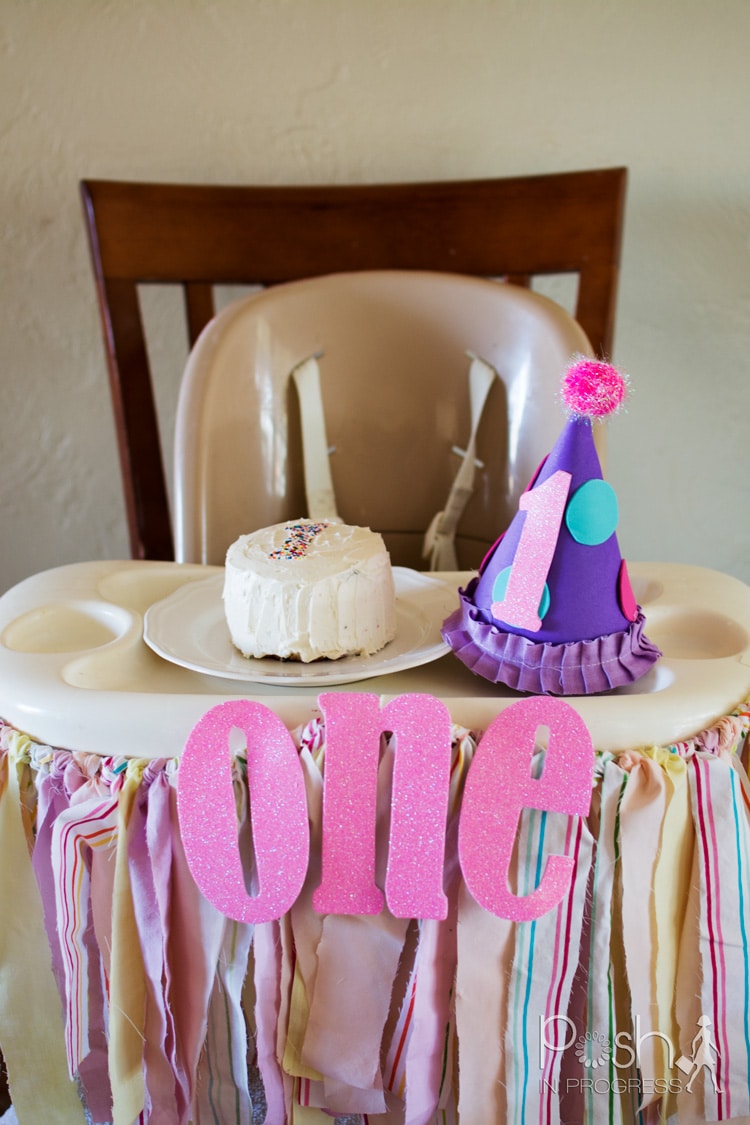
I’m so happy with how Gigi’s first birthday decorations turned out. They were fairly simple, but really adorable. She even wore her hat the entire time! I love how the DIY rag tie banner turned out because I can totally use it again. I’m actually planning to hang it up in her room above her crib. It goes well with the pastels in her room and I can easily remove the one letters so it’s just a cute and simple rag tie banner.
In case you’re interested in how I made it, here are the directions so you can make your own easy and cute DIY rag tie banner.
DIY Rag Tie Banner
Materials:
4-5 old sheets or cotton fabric
fabric scissors
twine or yarn
sticky craft foam
Directions:
Cut sheets in 2 inch wide by 30 inch long strips. Depending on the desired length of your banner, you will need approximately 50 to 100 strips. (My three foot banner used approximately 50 strips.)
Tie the strips around the twine with a single loop. (I chose to keep my strips close together, but you could space them more if you like a more spaced out look.) Alternate different colored/patterned strips to the desired length.
Cut the twine to your chosen length, leaving slack on both sides so you can hang the banner. That’s it, it’s that simple!


This site uses selective affiliate links, which means a commission is earned if you make a purchase via the link. The price you pay will be the same whether you use the affiliate link or go directly to the vendor’s website using a non-affiliate link.
Our editorial content is not influenced by advertisers or affiliate partnerships. We appreciate, and thank you for, your support!